Getting back into making some videos after saying I would and then kind of forgetting about it for months.. Here is a quickie of me retouching a simple portrait, sped up to about 10x real time. I don't give detailed descriptions of the process but there are little notes during various parts of the video that mention kind of what is going on. Hopefully I'll stay motivated and come up with some more cool tutorial videos soon.
Blog
Behind the scenes, reviews, and other commentary.
Video: Brightening Eyes in Photohshop
Made another little tutorial video, this time about easily brightening eyes in Photoshop.
A Few Portraits and Some Musings on Studio Light

Although these photos aren't particularly elaborate, I thought I would write up a little post about some portraits I did of a friend back in October.
I met and started hanging out with a few new people last year and as usually results from my acquaintance, we ended up taking some photos. Renee, in these photos, didn't have anything particular in mind and while her and some other friends were over to hang out one day, we took a few photos.
I suppose it is kind of contrived to rely on wind whipping up long hair to add interest but it has pretty much become one of my go-to crutches when I want to add some interest to a shot without doing anything too crazy. These kind of remind me of 70s/80s glamour shots. Kind of over the top but (I'd like to think) in a good way.
I can't remember what I was doing with the light setup but I'm 80% sure it was my usual 60" softbox-umbrella or possibly a smaller 36" white umbrella. Simple light and my plain dark grey background can help create portraits that are modern and keep the focus on the subject. I have read a fair deal about various portrait lighting techniques and setups but I usually go back to just using one well placed key light and evening out the tones in Photoshop.
Fill light can be useful of course, and I rely on that a great deal more when I am shooting in a studio for a fashion or product shoot. In those cases, clearly representing the product is necessary so I often use more even light.
I go back and fourth on using a rim or hair light. I feel like always using a hair light can make portraiture look rather pedestrian and formulaic. It dates it, not necessarily in time, but in a photographers style. At least to me, it can say "I'm learning how to take portraits and I read that a hair light is necessary for separation so I'm using it". Aesthetically, there isn't necessarily anything wrong with it, I just think that it isn't always a necessary element of a successful lighting setup.
I think some of the reasons that I tend to use light the way I do are my influences. I find that the techniques used in fashion photography translate well to most portrait situations. Usually a soft light, positioned high and often to one side of the subject provides a flattering and interesting look. I'm also a big fan of renaissance, baroque, and rococo portraiture. You don't often see many obvious light sources in a renaissance portrait so much as a perfectly placed soft light source. Light so soft it appears to create it's own fill. Some of my favorites of my own photos are the ones where the light has a beautiful, soft, painterly quality.
Some day I would love to set up interesting scenes, perhaps from mythological tales, and light them with massive scrims and soft boxes to get that perfectly soft renaissance light. Putting aside the times when I'm purposely going for a modern or different look, I generally like to try and recreate the look of natural light. Even if that means something ends up looking decidedly unnatural which is sometimes the case when I shoot in full sun but light the subject with a big softbox or umbrella. You can tell the light was hard/directional in a certain way but the subject is lit by what looks like the light from a perfectly cloudy day. Overcast light is beautiful.
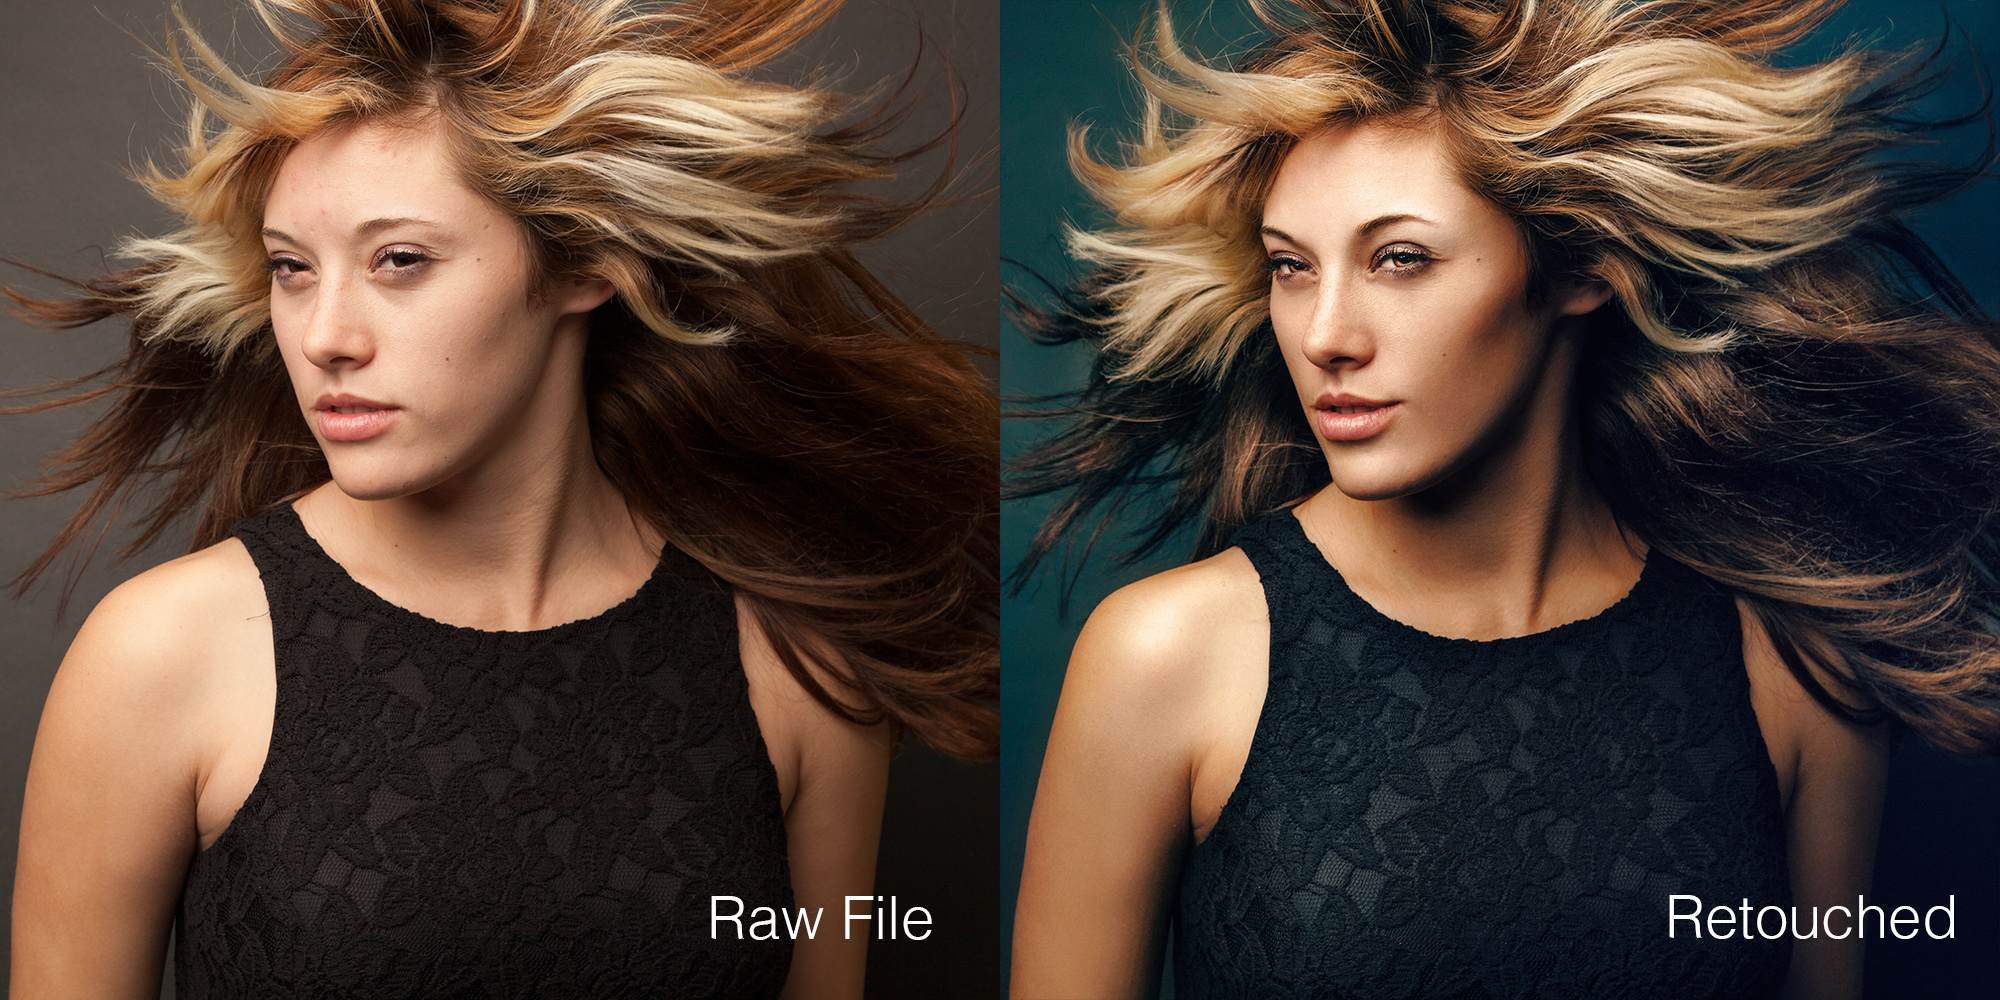
Anyway, back to the portraits that I originally intended this to be about before my distraction into light. If you made it this far, thanks for reading and here are some before/after retouching examples of the photos of Renee:

Video: Retouching Time Lapse
Here is a simple new video I've recorded that showroom basic portrait retouching. Essentially just a recording of my screen while I work in Photoshop played back at 500% speed, you can get an idea of what it looks like when I'm retouching skin and color.
I'm still sorting what kinds of things I want to do detailed tutorials on but I thought it might be cool to see something like this.
As I note in the description on Youtube, the "final" image isn't really done but it is probably 85 or 90% done. I'd probably do a bit more detail work and of course some sharpening.